Winch Restoration
Refurbishing a “throw-away” Winch back to its full Potential
300+ already viewed!
Article Summary
It’s the Covid time February 2021, another rapid spread of the virus is happening in Sri Lanka. Bad time for everything else, but a good time for all the Ham Radio station improvements.
Article Highlights
- Little Background
- Worm Gear Heavy Duty Winch
- Operating Video

Kamal Edirisinghe
4S7AB / KA5MAL
Author Mar 2021
Having More than 35 years of experience in the Field of Amateur Radio, I have published many articles in prestigious international publications like, QST, CQ-DL, NCJ, Six-News etc.. Here in this web site, these write-ups are intended to give you knowledge about my designs and projects related to the hobby. The articles about foreign HAM activities are intended to share my experience.
- Full Solar Powered Radio Station
- SO2R and Multi-Multi Compatible
- Operate on All Bands/Modes/SATS
- DXCC #61,271
- IOTA AS-003, CQ-22, ITU-41
Background
My 40m/30m 2el quad was needing adjustments time to time and it was installed on a fixed tower. Without a bucket truck, the maintenance work was quite difficult and was quite expensive. So, my long term plan to install a 3 section crank up tower was timely and I was able to achieve it by the end of 2020. But this article is not about that. I wanted to share my experience on the most important part of it, the winch.
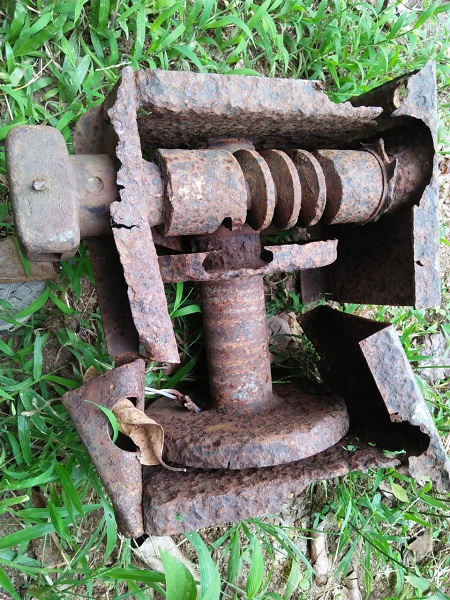
The picture on the left is the winch that was installed on the used tower some unknown years ago and it was completely corroded and un-useable. Therefore I have installed a boat winch to crank up the tower (picture below) and only after few crank ups, the winch teeth of the outermost wheel started getting damaged. You can see the damaged teeth in the be picture in the right.
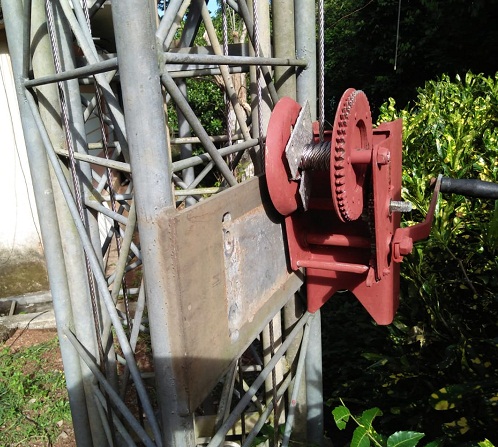
So, I learnt the lesson of the need to have a heavy duty winch to lift one beast mounted on the other which was really heavy. The boat winch with double gears was rated at 3000lb (~1360kg) but it was not doing the job as advertised. The calculated weight of the quad and the tower with all accessories is about 800KG.
At this point of time, I decided to refurbish the “throw-away” winch (above) which had a worm gear and it is known to handle much power anyway. Besides, finding a heavy duty manual winch was not possible at this time.
The first step was to dismantle the whole winch upto the gear wheel level. Because, if the gear wheels are unuseable, there is nothing much to do with it. As the pictures show, the cable holding rim was also full with corrosion. After dismantling everything, I realized that I am lucky enough.
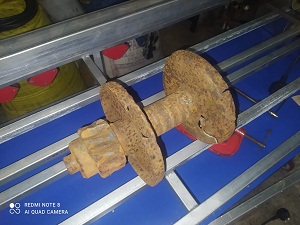
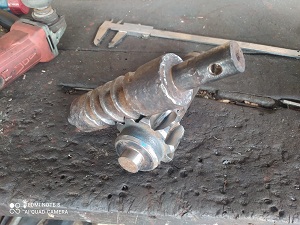
The worm wheel and the worm gear were both in very good condition. Some of the original paint was also there in the gear wheel shaft. (Below pictures)
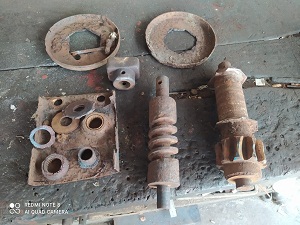

But all the razors were corroded and stuck to the housings. They had to be cut and removed. I need to mention the help of Mr. Rukmal, who is a well experienced person in my area with all the machine tools who helped me with the entire operation.
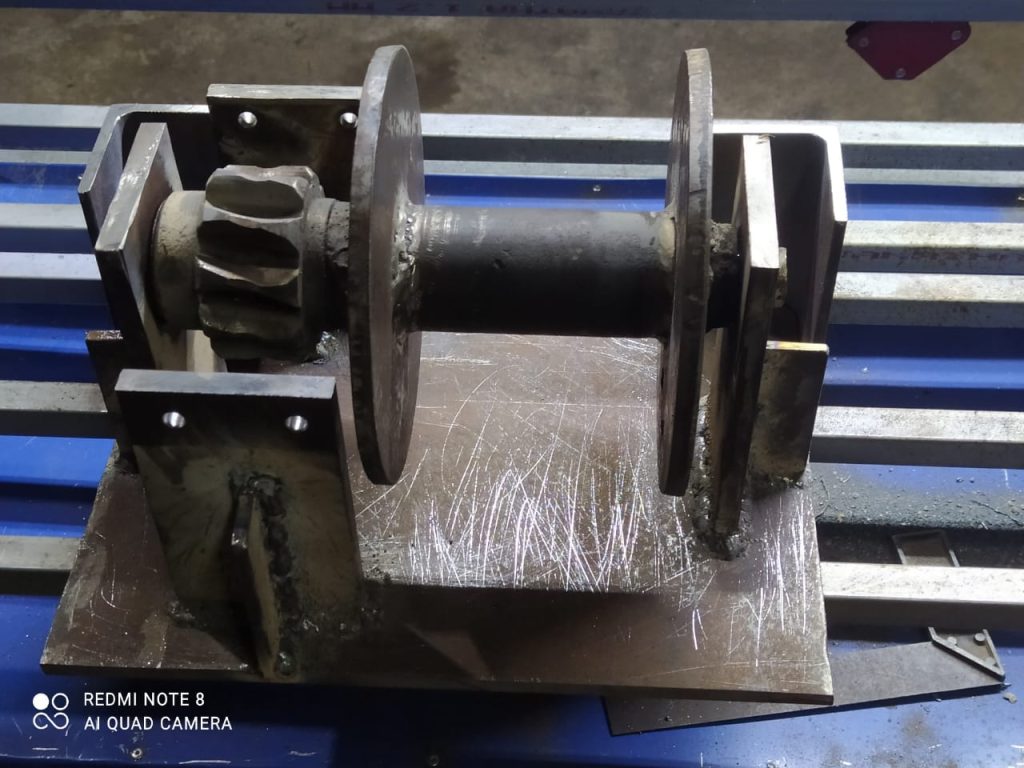
Then the next task was to re-design the whole thing to have better load handling capability and most of all mechanical stability. Becuase, if the winch fails, the whole tower and the antenna can be on the ground in seconds. (Before putting the safetey latch)
The most omportant thing is to identify the load handling points when the cable is wound around the drum. The load on the razor is vertically upwards all the time. Also the windling lever produces a force perpendicular to the cable drum’s shaft and this force can be managed without razors if properly designed. So the first part of the design was to get the cable drum with enough size to hold a 6mm steel cable and a total length of about 45ft when the tower is fully extended. The drum was constructed using 8mm steel plates. Only to hold the cable, 8mm was not required but 3mm was enough. But there is another hidden agenda behind that.
The cable should be routed through this drum to the other side to clamp and stop slipping back. In most of the winches, this was done by just drilling a hole perpendicular to the plane of the drum plate. In my case I have decided to give this hole some angle to pass the steel cable gently without having any 90deg bends. This was helpful in maintaining the full strength of the cable and also helps a lot when the second layer of winding is touching the cable egress point. A very smooth llayering with equi-spaced cable was possible at the end.
The gear wheel shaft was secured on razors as below. Then came the part of mounting the worm wheel part. A very very important thing was to maintain the spacing between the gear wheel and the worm wheel. This will ensure the maximum load transfer and mimimum wear and frictions. Lot of time was spent on getting this right and it was well worth the time and money spent on that. The finished winch was painted with Zinc Phospate anti corrosive paint and mounted on the tower.
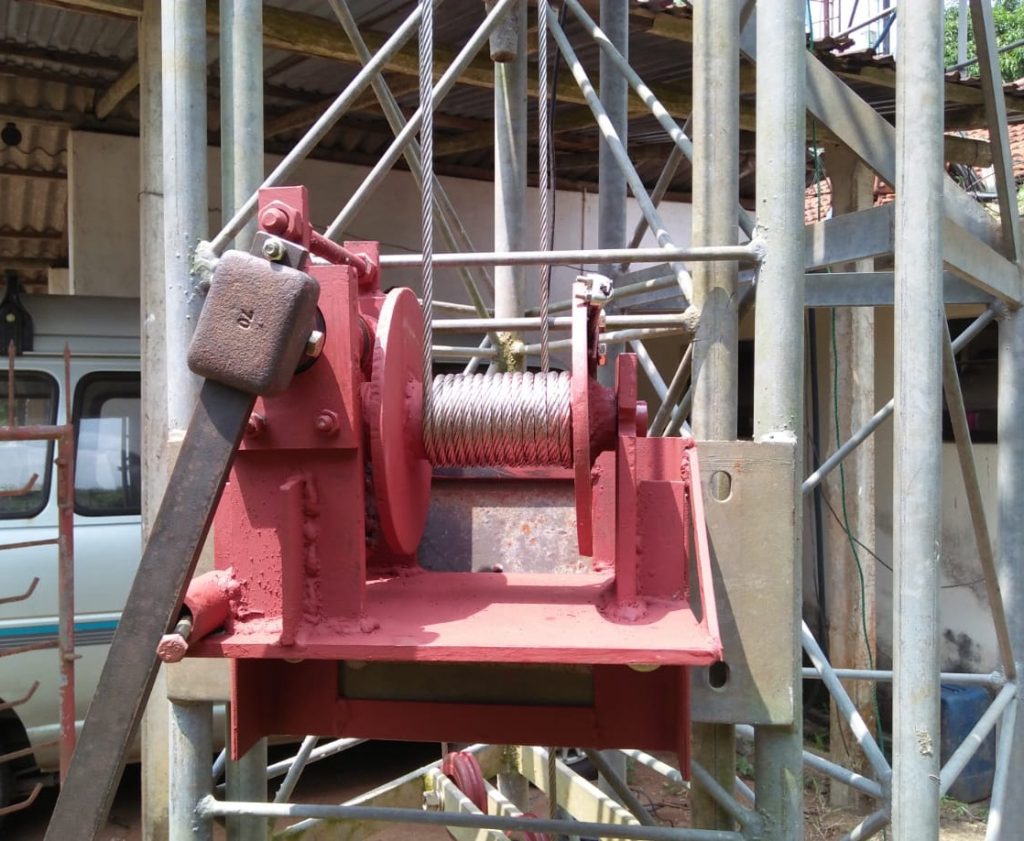
The final outcome was a heavy duty worm wheel based winch that can easily pull my heavy duty 3 section 60ft tower. A 2ft handle was fabricated and that was easy on the hands. But since the gear ratio was high (1:10) , it needed lot of turns to crank it fully up from the resting position. Therefore, the next step would be to install a motor to do that job quickly. The picture at the bottm shows the final product.